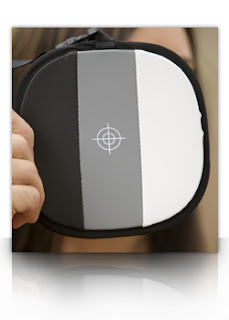
As simple as it sounds, this one area of digital photography seems to mystify photographers at all levels. While some photographers have a tried-and-true method of nailing the white balance with every exposure, others seem to struggle no matter what tools and devices they employ. Worse yet, others simply set the camera to AUTO and end up having to open and tweak each individual file, wasting time and effort on something that can be managed easily.
While I don't profess my method to be "the only way", it is definitely the easiest I have ever used to streamline my workflow and get great, consistent color. Here's a step-by-step of what I do using the White Balance Targets from Photovision Video:
Part One - In-Camera
 1 - Set the WB on your camera body to 5000k and lock it in. Leave it there, don't touch it . . . ever.
2 - Once you've determined your exposure using your hand-held light meter (yes, you really do want and need one of these!), photograph your subject holding the target with the white stripe closest to your light source.
3 - Photograph that outfit / set as you normally would until you either change lighting, outfit or background again.
4 - Each and every time you change lighting, background or outfit, repeat Steps 2 & 3.
There you go. These simple tips will speed up the pace of your session, because you're not constantly going in to redo a "custom white balance" or worse yet, setting your camera to AUTO WB.
Part Two - Post-Production
Once you have copied the images to your hard drive and made appropriate backups, now you can make all your color-corrections with a few simple clicks in Bridge..
1 - In Bridge, open the files from a specific outfit or background. I always look for the target as my first image, then highlight all of the images until I come to my next target.
2 - Using the White Balance dropper, select the white area of the target. You may then tweak your settings for saturation, vibrance, etc. using the sliders in the Camera Raw window.
3 - Click Select All in the upper left-hand corner, then click "Synchronize". Click "Done" when sync is completed.
4 - Continue until your images are all balanced to satisfaction. Once you've tweaked everything, you may edit and process the files you wish to work with as JPGs.
Consistency is the key; if your white balance and exposure are all over the place, your final images will look the same. Strap that light meter to your hip and wear the target around your neck during every session and you'll be amazed at the new look of your images!
- David Grupa

No comments:
Post a Comment